
Some time ago, PTC introduced the “flexible modeling” extension into Creo. Changes to models and retaining design intent are now easy thanks to the direct modelling capabilities within Flexible modelling in PTC’s traditional parametric 3D CAD System.
Flexible modeling is extremely useful in early concept design work where models change frequently, as well as for last-minute changes to existing models.
With Creo 4.0, PTC have extended flexible modeling to Sheetmetal Design. In this post, we will show you how to change corner seams on a sample part.
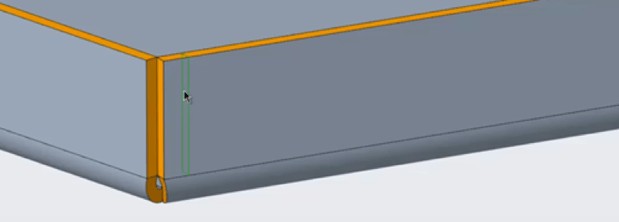
Changing Corner Type
It is now possible to change a corner type with just a few clicks.
Simply select a corner face, and then select Edit Corner Seam in the mini toolbar (or the Flexible Modeling tab of the ribbon).
Next, Right-click any area in the graphics section to open the context menu and select from different types including Blind, Gap, and Overlap. The corner type is updated instantly.
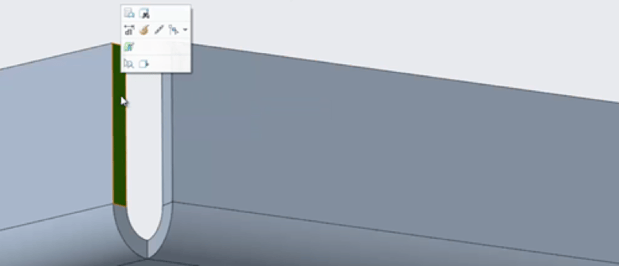
A right click can change the type of seam
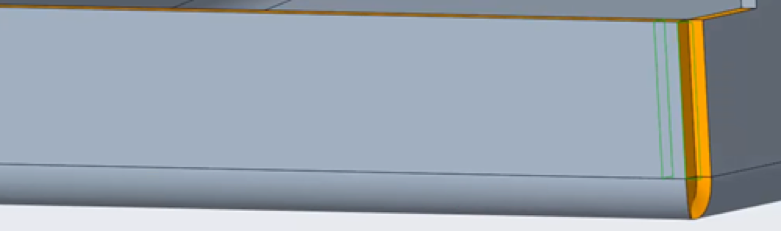
Flipping Sides with Overlap Seam
You can now easily switch the preferred side of the seam if you changed the type to Overlap.
Right-click anywhere in the graphics area to open the context menu and select Flip.
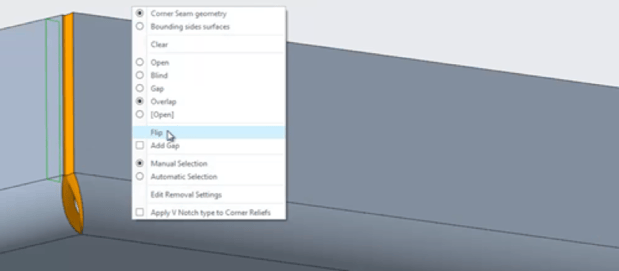
Flipping the sides of an Overlap seam.
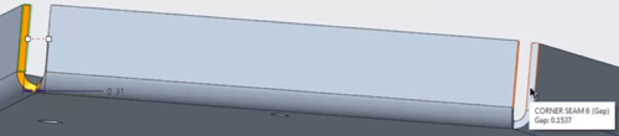
Changing Size of Gap
For Gap type seams, grabbing the dragger can change the size of the gap.
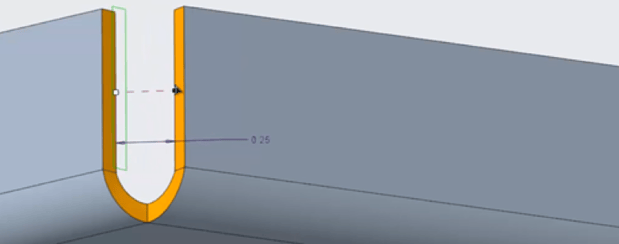
Dragging to change the size of the gap.
Copying Seam Definition
Typically, seams on a part are created in pairs, with both seams being the same type. Once one seam is set up, simply copy it to the others on your part. It is also possible to copy the definition by selecting the bend surface.
Same as before, select a corner face and click Edit Corner Seam in the mini toolbar.
Update/Change the seam as desired and then click a face on another seam to add it to the selection. The same seam properties are applied by the system to the new seam.
Copying a seam definition from one seam (left) to another (right).
What about editing seams that Can’t Be Detected Automatically?
Corner seams can also be defined in situations where they cannot be detected automatically. Start by selecting the Edit Corner seam from the Ribbon.
A corner where the seam wasn’t automatically detected.
The bend and wall definition are analysed by the system, and then a possible solution for a corner seam is presented.
A possible corner solution.
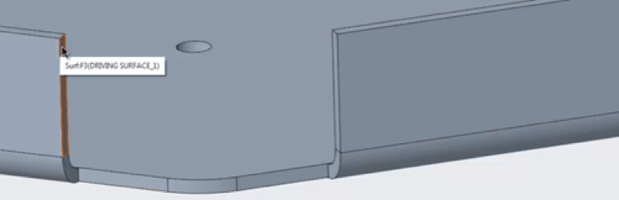
Editing Seams without a Neighbour Wall
The system would not have specified the corner seam definition for the neighbour if you had tried to create the wall in this example in the past, However, when you select a corner face and click Edit Corner Seam…
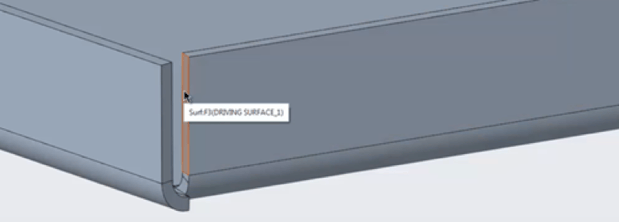
Selecting a face of the corner.
…the system analyzes the neighbor conditions and suggests a solution.
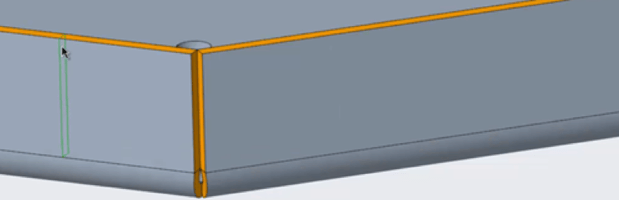
Creo analyzed the corner and suggested a proper seam.
Once you are happy with the seam, the same corner seam solution can be applied at the other side of the wall. Selecting a face for the second seam will simply add it to the selection (or just select the bend surface). The system will then automatically apply the same parameters to this seam.
The same seam applied to the other end of the wall.
Start Using Creo 4.0 Today
We're are only just getting started with showing you all the latest capabilities in PTC’s latest release. We will have much more in coming weeks so keep your eyes peeled! If you haven’t already downloaded Creo 4.0, visit the Creo 4.0 page to find out more about this exciting new release and start using it today.