
If you need to add pipes to your design, it’s easy to do so with the Cabling and Piping module in Creo 4.0. But what happens when you encounter errors in the piping database?
Any designer who has spent countless hours sifting through the piping catalogue line-by-line to find an issue will know how time-consuming and frustrating the fault-finding process can be.
Good news: Creo 4.0 will now validate your database and highlight exactly what it is that needs to be fixed in just a few short steps:
How to run the Piping Validation routine in Creo 4.0
From the Setup group, you’ll find the Piping tab. Click Setup and then select Check Piping Database.
Creo will scan the database for errors and if it finds any, it’ll display them along with any warnings:
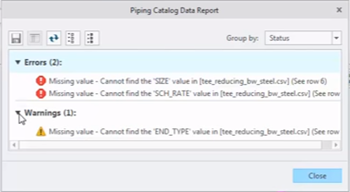
Note that the results are grouped by status in the results box (either ‘Errors’ or ‘Warnings’), with the number of each confirmed.
Changing the report grouping
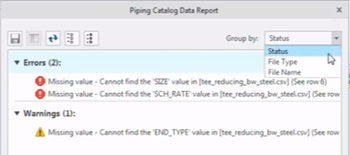
To simplify the process of identifying piping database issues, Creo allows you to change how the messages are displayed.
You can view them by:
- status;
- file type; or
- file name.
To change the report grouping, simply click the Group by drop-down menu:
Using Excel to edit the piping catalogue
Once you’ve identified the issues within your database, you can open the catalogue to fix the problems.
The most effective way to do this is with Microsoft Excel:
- Note the Excel row number for the error you want to address by looking at the end of the row in the validation report.
- Right-click the line in the validations report and click Open in Excel.
- Once in Excel, find the row number you noted in step 1.
- Change the value.
- Save the file in Excel and refresh the validation report in Creo.
